Deployment Overview
This document describes the steps to integrate WatchGuard Email Protection with Microsoft 365.
Contents
Platform and Software
The platform and software used in this integration include:
- WatchGuard Email Protection administrator account
- Microsoft 365 administrator account
- DNS Hosting provider
Integration Topology
This diagram shows the test topology for the WatchGuard Email Protection with Microsoft 365 integration.

Before You Begin
Before you begin these procedures, make sure that:
- You have a domain in Microsoft 365 that is managed by your DNS hosting provider.
- Microsoft 365 Mail Server can send and receive mail using your domain.
Update the Domain MX Record
When you add WatchGuard Email Protection servers to the MX record for your domain, you can route incoming email messages for your domain to WatchGuard Email Protection servers. WatchGuard Email Protection servers then filter the email messages and forward them to the Microsoft 365 email server. This process takes place before the email messages reach your Microsoft mail inbox.
To update the MX record for your domain:
- Log in to your DNS hosting provider. Back up then remove all of the original MX records.
To identify the MX record from Microsoft 365, go to Get the Microsoft 365 MX and TXT Values. - Add the WatchGuard Email Protection MX records shown in WatchGuard Email Protection Server MX Records. We recommend that you add all the records with different priorities in each range.
It might take some time for the DNS changes to propagate.
Add the Domain to WatchGuard Email Protection
To add your domain to WatchGuard Email Protection:
- Log in to WatchGuard Email Protection as an administrator.
- From the Scope Selection drop-down list, select the company domain.
- From the left navigation menu, select Back > Settings > Domains.
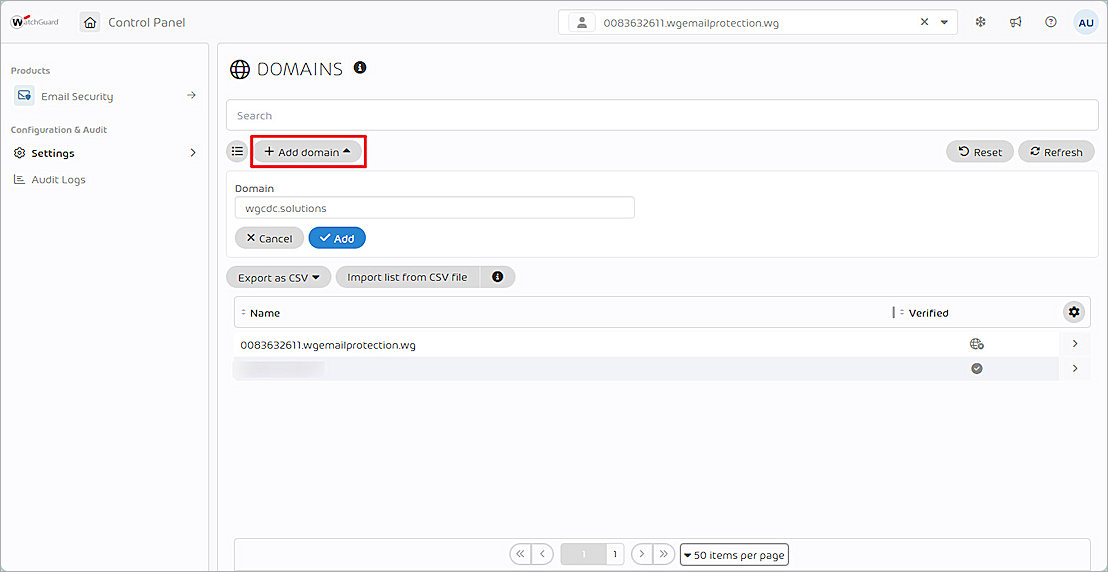
- Click Add Domain.
- In the Domain text box, type the name of your domain.
- Click Add.
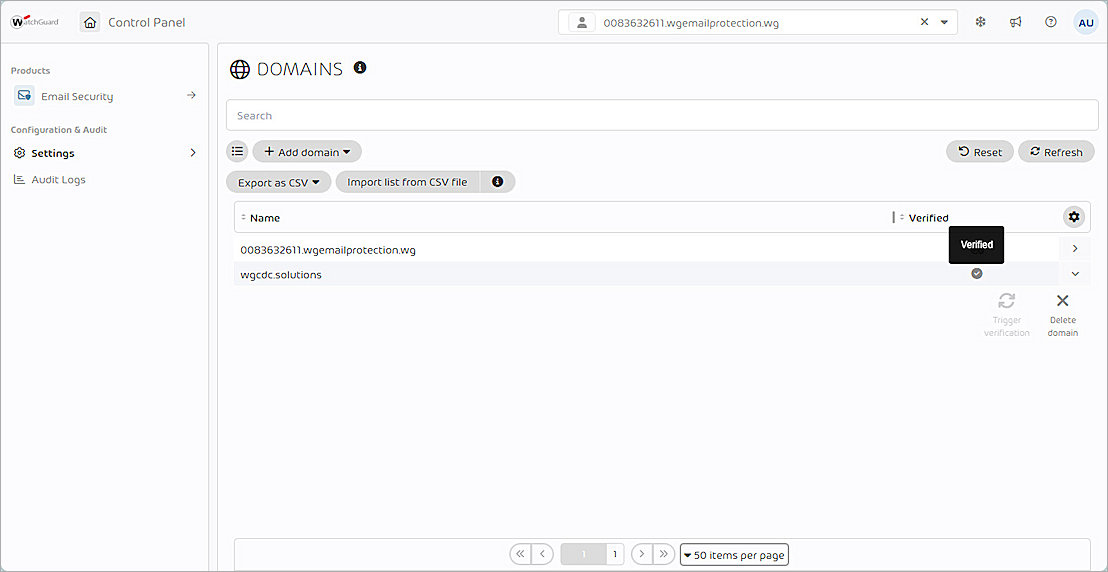
- Next to the new domain, click
 .
.
A menu opens. - To verify that the MX records point to WatchGuard Email Protection, click Trigger Verification.
If the domain passes verification, the domain status shows as Verified.
Update Domain SPF Records and Activate SPF Check
The Sender Policy Framework (SPF) records of your domain must point to WatchGuard Email Protection SPF records. This authorizes Email Protection to send email messages from your domain. Recipients outside your organization can use the SPF records to perform SPF checks on email messages from your domain.
To update the SPF record:
- Log in to your DNS hosting provider.
- Add this SPF record: v=spf1 include:spf.hornetsecurity.com ~all
It might take some time for the DNS changes to propagate.

To activate SPF check:
- Log in to WatchGuard Email Protection as an administrator.
- From the Scope Selection drop-down list, select the company domain.
- From the navigation menu, select Spam & Malware Protection > Email Authentication.
- To refresh the status, click Refresh DNS Settings.
The DNS status settings for the domain show in the table.- A green check mark indicates that the domain settings are correct.
- A yellow exclamation mark icon indicates that no records are set for the domain.
- A red X icon indicates that the domain settings are not correct.
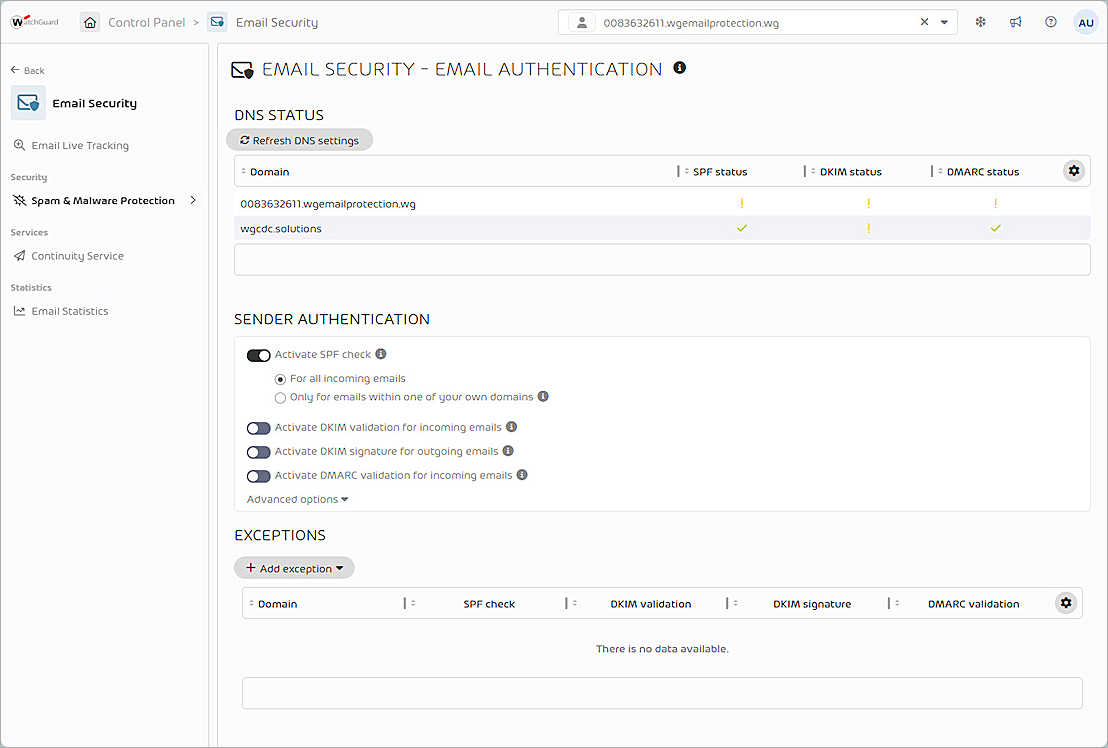
- From the Sender Authentication section, enable Activate SPF Check.
- Select For All Incoming Emails.
Configure Spam and Malware Protection
To configure Spam and Malware Protection in WatchGuard Email Protection:
- From the navigation menu, select Spam & Malware Protection > Settings.
The Malware Protection page opens. - Select the General Settings tab.
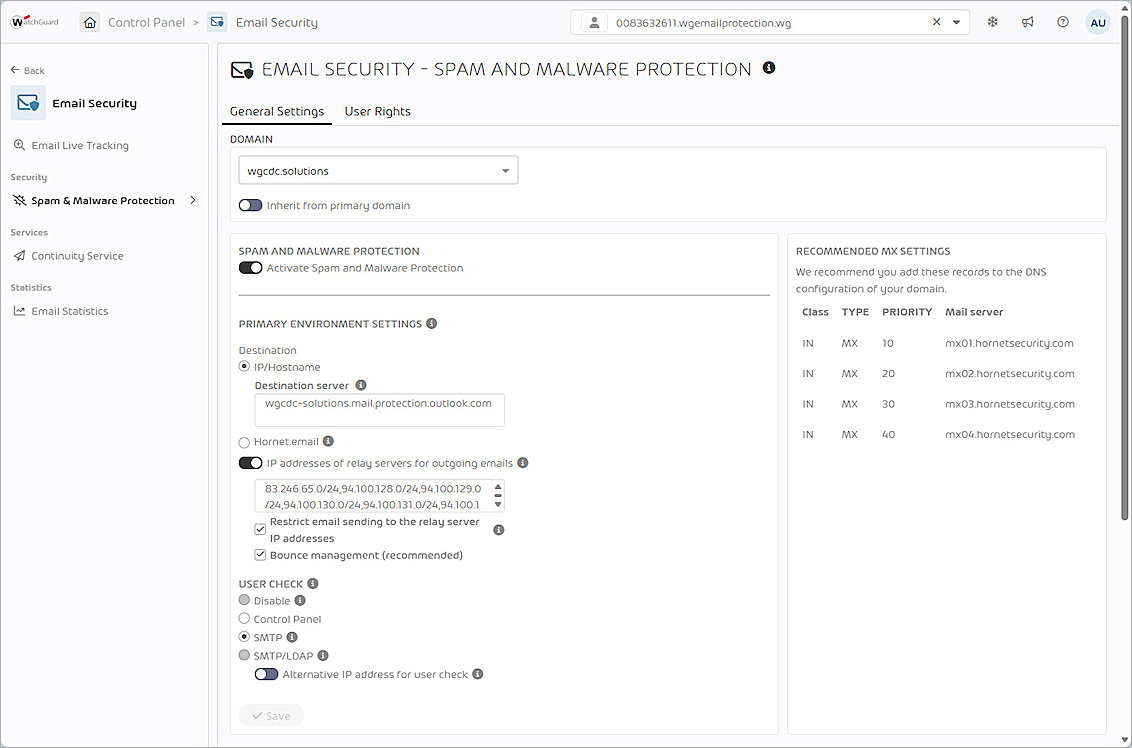
- From the Domain drop-down list, select the domain you want to activate Spam and Malware Protection for.
- Disable Inherit From Primary Domain.
- Enable Activate Spam and Malware Protection.
- From the Primary Environment Settings > Destination section, select IP/Hostname.
- In the Destination Server text box, type the destination server address of your Microsoft 365 environment.
- If you configure the outgoing traffic relay in the server, enable IP Addresses of Relay Servers for Outgoing Emails.
- In the text box, type the IP addresses of the server that send the outgoing messages to Email Protection.
- Enable the Restrict Email Sending to the Relay Server IP Addresses and Bounce Management (Recommended) check boxes.
- From the User Check section, select SMTP, disable Alternative IP Address for User Check.
- Click Save.
- From the Email Filter Settings section, keep the default settings.
Restrict the Inbound Email Traffic of Your Microsoft 365 Mailboxes
To prevent your Microsoft 365 environment from receiving unprocessed emails by our services, you must configure a connector for inbound email traffic. This connector makes sure that only messages coming from our IP address range are accepted by Microsoft 365. Any email messages that do not originate from our IP address range are rejected.
To restrict the inbound email traffic of your Microsoft 365 mailboxes:
- Log in to the Microsoft 365 admin center.
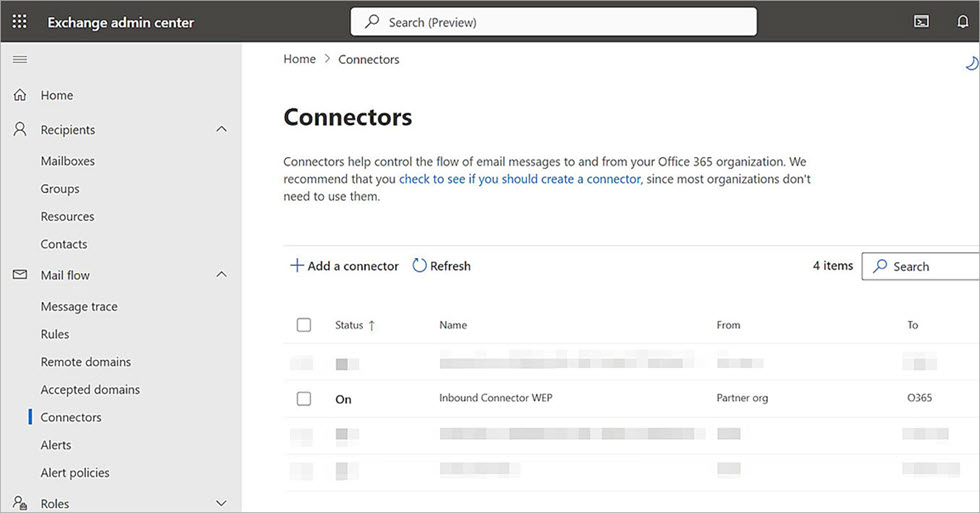
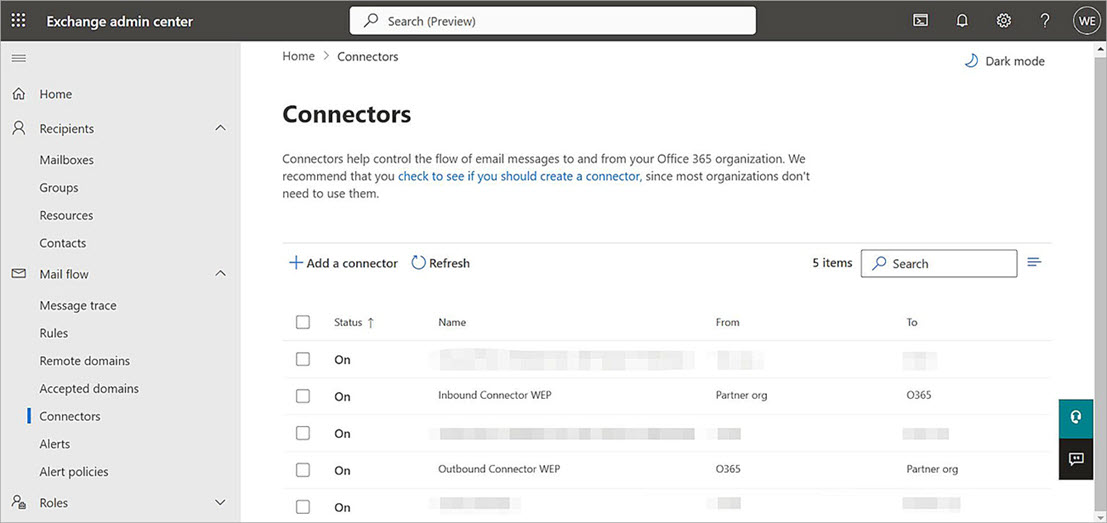
- From the navigation menu, select Exchange > Mail Flow > Connectors.
- Click Add a Connector.
The New Connector wizard opens.
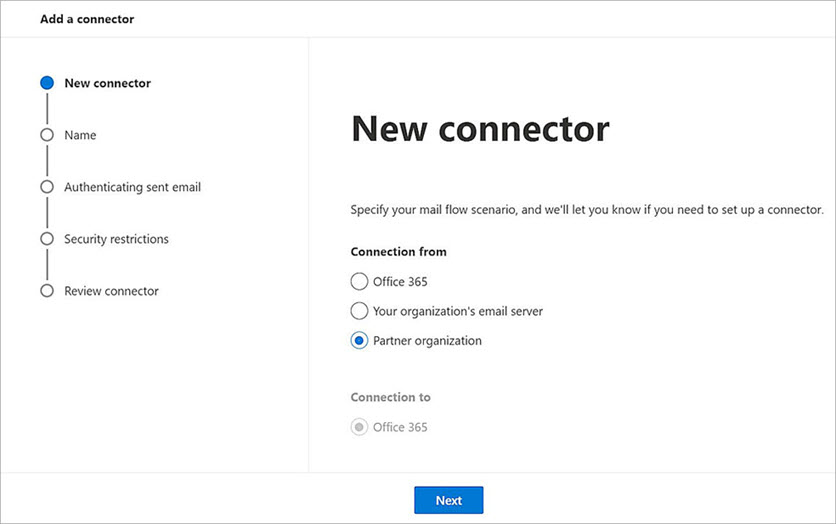
- From the Connection From section, select Partner Organization.
In the Connection To section, Office 365 is selected by default. - Click Next.
The Connector Name wizard opens.
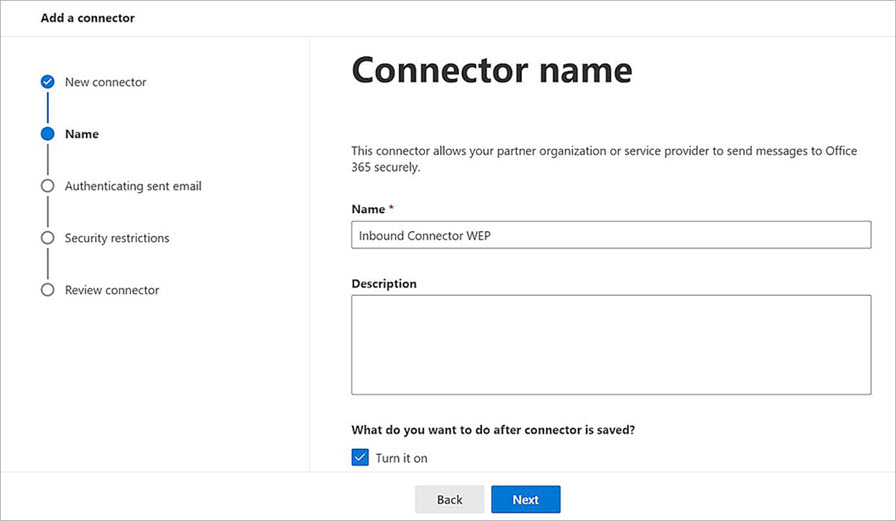
- In the Name text box, type the connector name.
- Click Next.
The Authenticating Sent Email wizard opens.
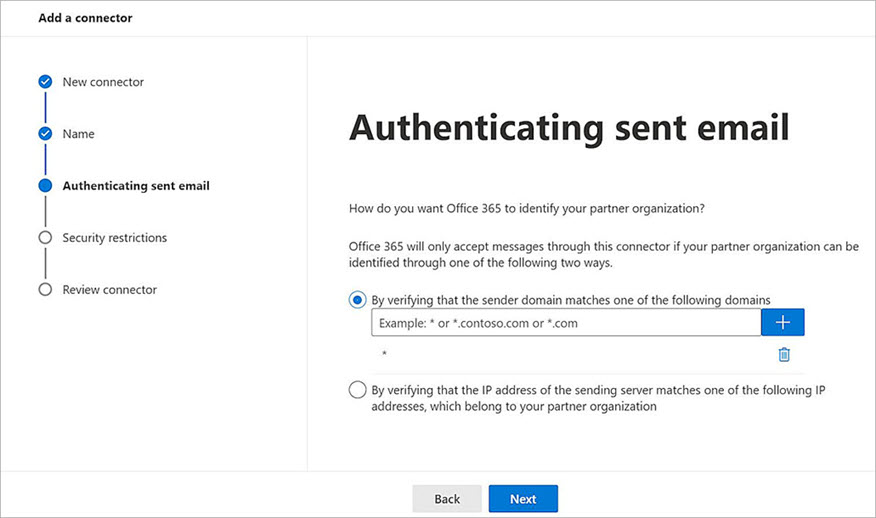
- Select By Verifying That the Sender Domain Matches One of the Following Domains.
- In the text box, type *. Click +.
- Click Next.
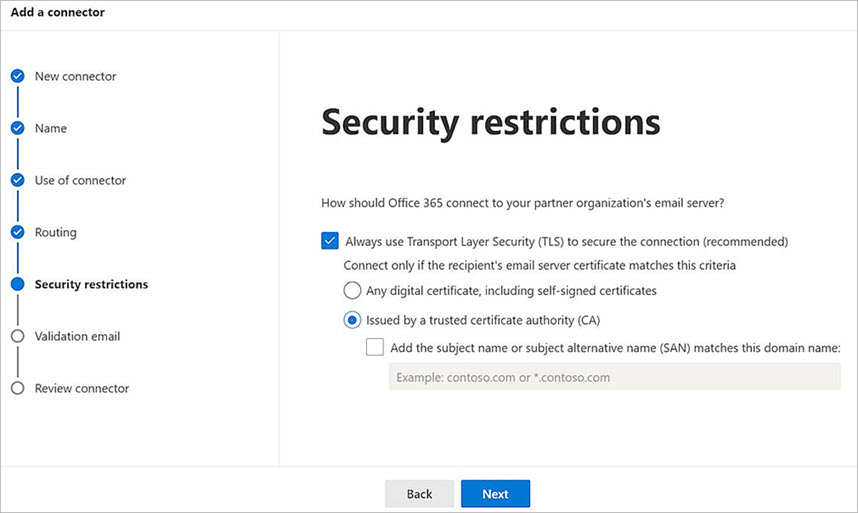
The Security Restrictions wizard opens.
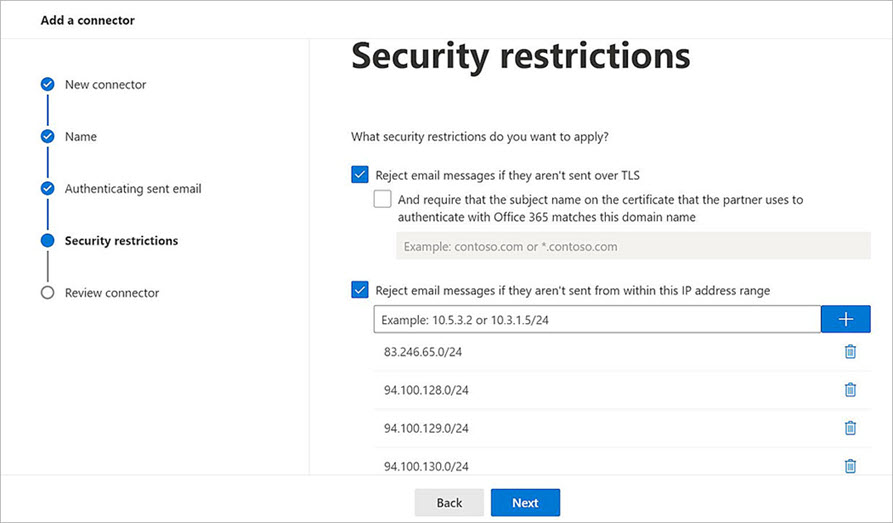
- Select the Reject Email Messages if They Aren't Sent Over TLS check box.
- Select the Reject Email Messages if They Aren't Sent from Within this IP Address Range check box.
- In the text box, type the IP addresses from the WatchGuard Email Protection Servers IP Address Range section.
- Customers in Canada must additionally enter the IP addresses from the WatchGuard Email Protection Servers IP Address Range in Canada section.
- Click Next.
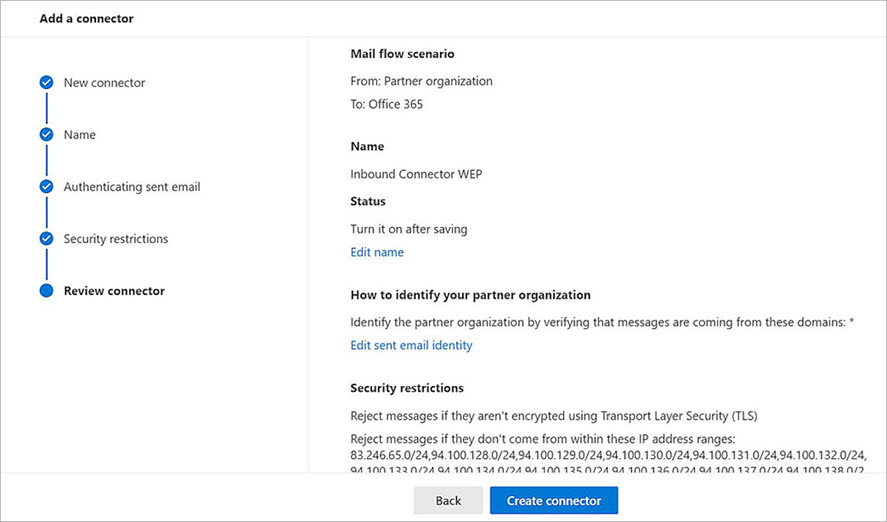
- Click Create Connector.
- Click Done.
Deactivate the Microsoft 365 Spam Filter for the Email Protection IP Address Range
If you want our services to filter your incoming email messages, you must disable the Microsoft 365 spam filter. If you do not, the Microsoft 365 spam filter classifies incoming email messages to your domains as spam. Our services filter your incoming email messages for spam.
To deactivate the Microsoft 365 spam filter for the Email Protection IP address range:
- Log in to Microsoft 365 admin center.
- Select Security.
The Microsoft 365 Defender home page opens. - From the navigate menu, select Email & Collaboration > Policies & Rules.
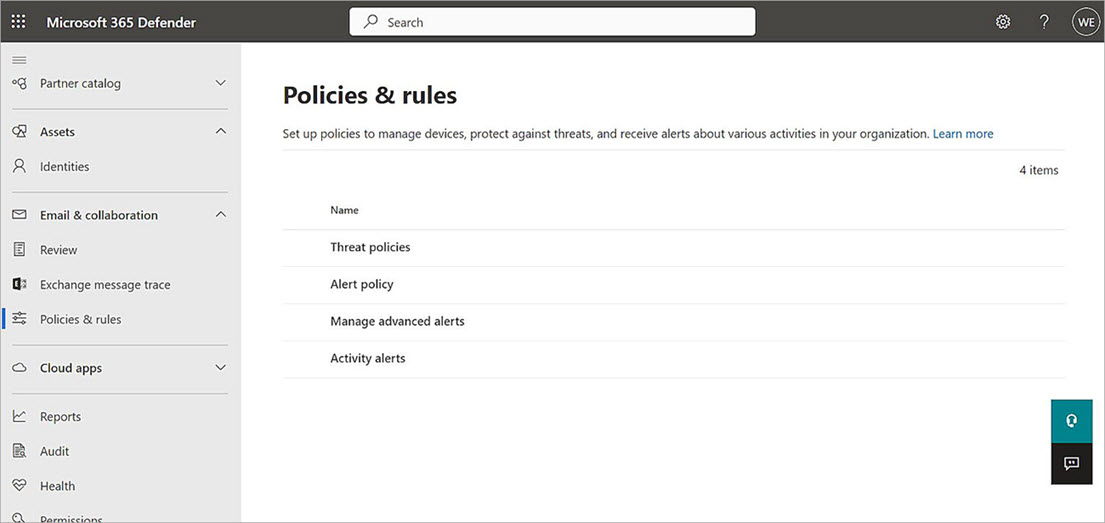
- Click Threat Policies.
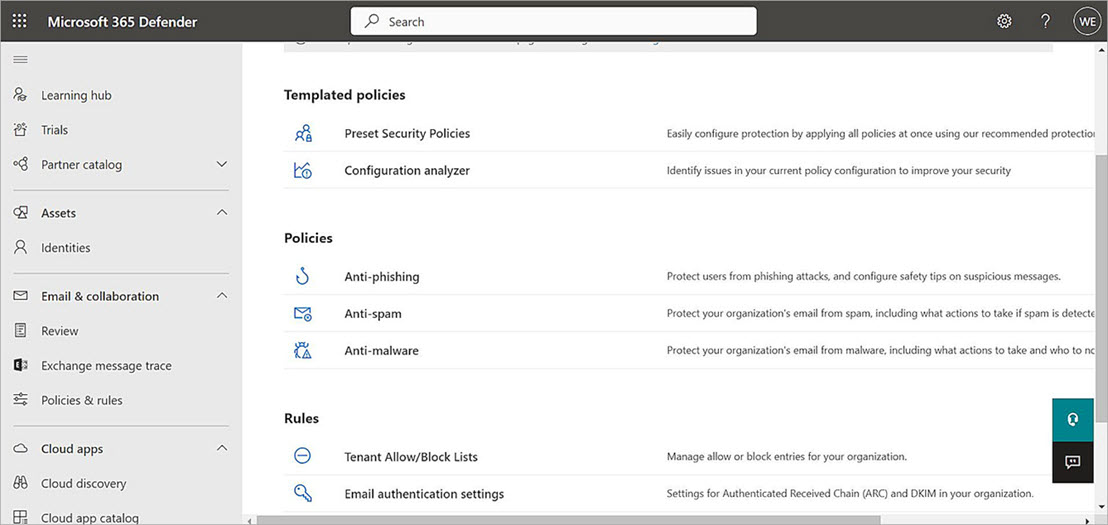
- From the Policies section, click Anti-spam.
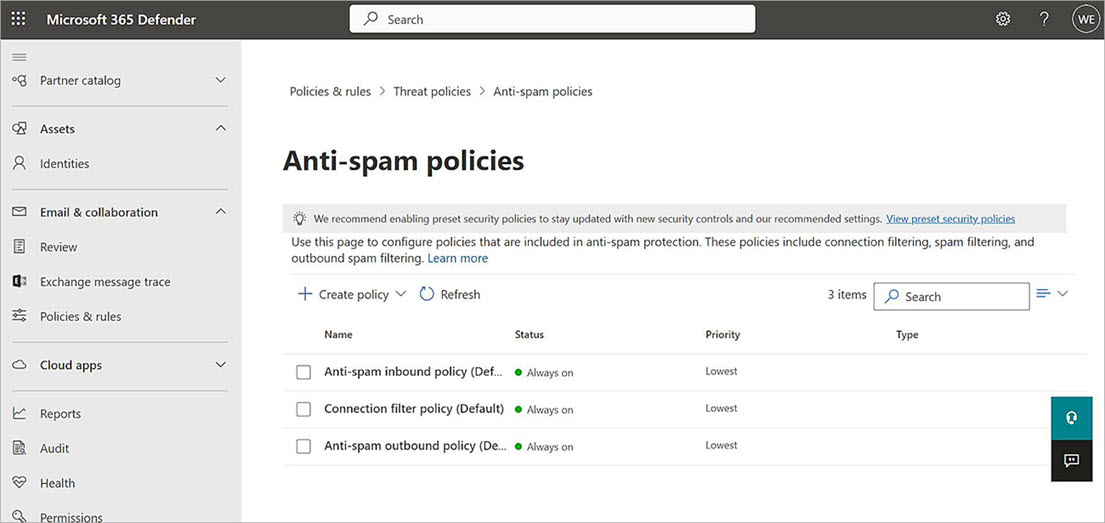
- Click Connection Filter Policy (Default).
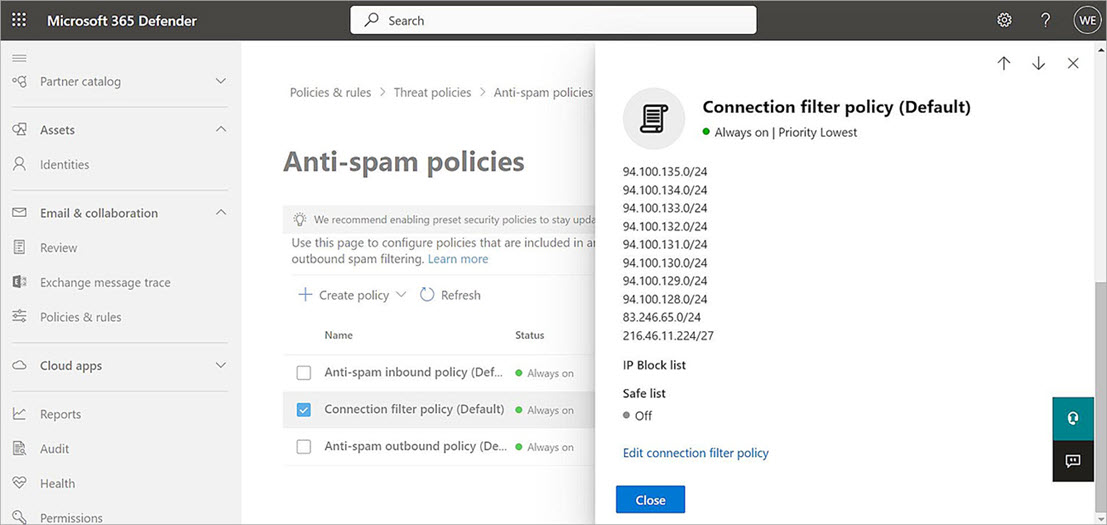
- Click Edit Connection Filter Policy.
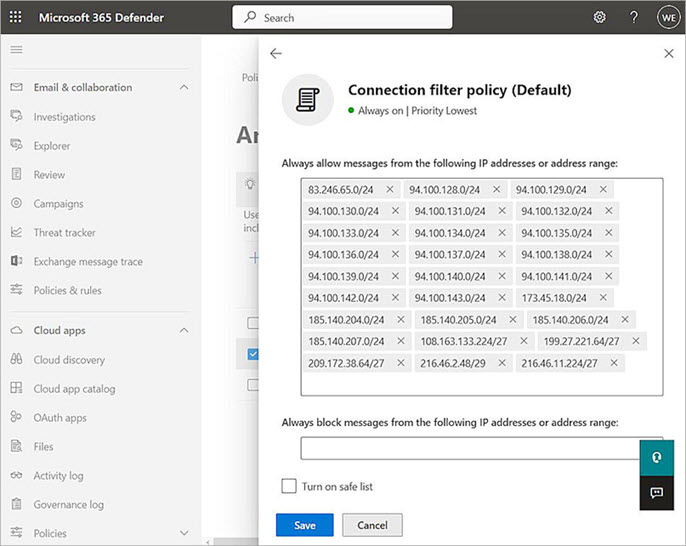
- In the Always Allow Messages From the Following IP Addresses or Address Range: text box, type the IP addresses from the WatchGuard Email Protection Servers IP Address Range section.
- If the customer is in Canada, you must also include the IP addresses from the WatchGuard Email Protection Servers IP Address Range in Canada section.
- Click Save.
Set Up the Outbound Email Traffic for Microsoft 365
Create a Connector for the Outbound Email Traffic
To create a connector for the outbound email traffic:
- Log in to the Microsoft 365 admin center.
- From the navigation menu, select Admin Centers > Exchange > Mail Flow > Connectors.
- Click Add a Connector.
The New Connector wizard opens.
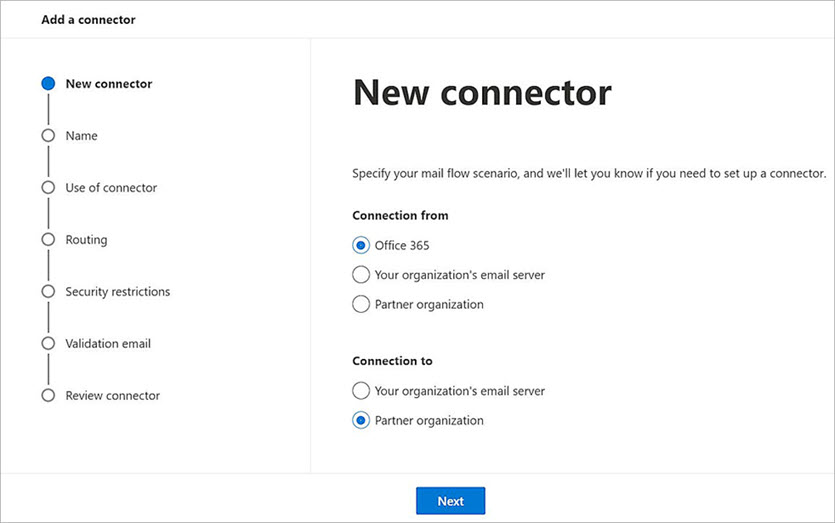
- From the Connection From section, select Office 365.
- From the Connection To section, select Partner Organization.
- Click Next.
The Connector Name wizard opens.
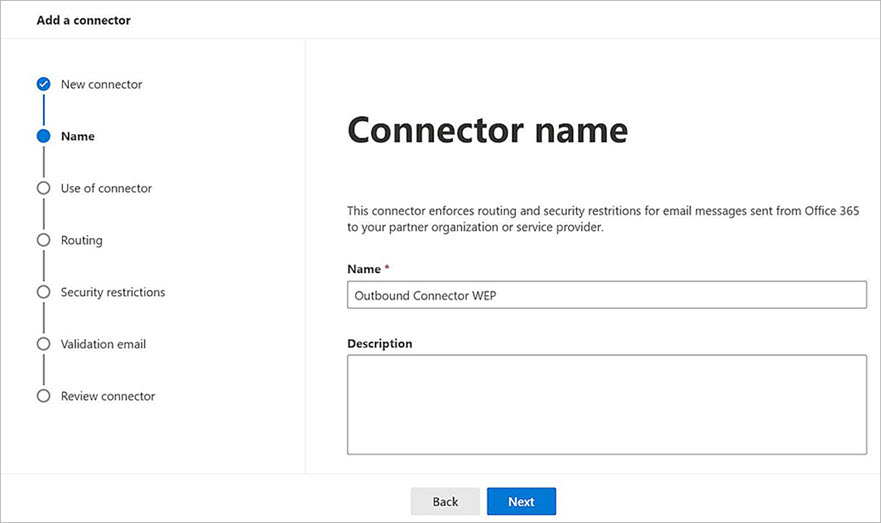
- In Name text box, type the connector name.
- Click Next.
The Use of Connector wizard opens.
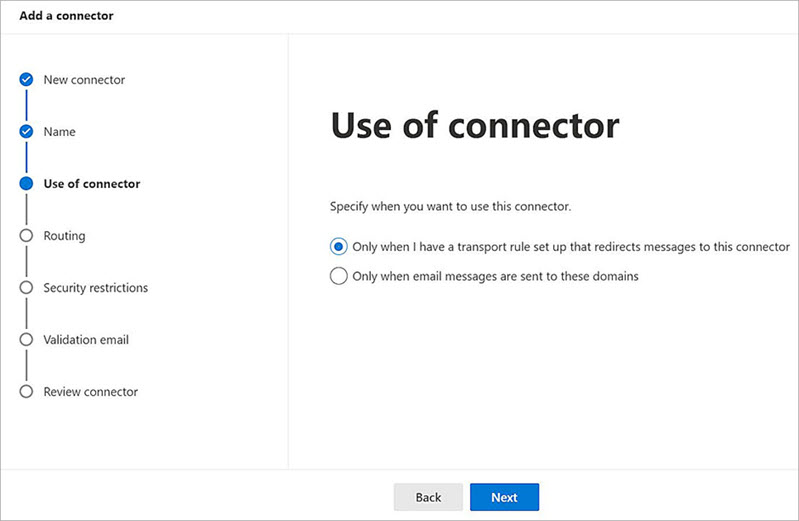
- Select Only When I Have a Transport Rule Set Up that Redirects Messages to This Connector.
- Click Next.
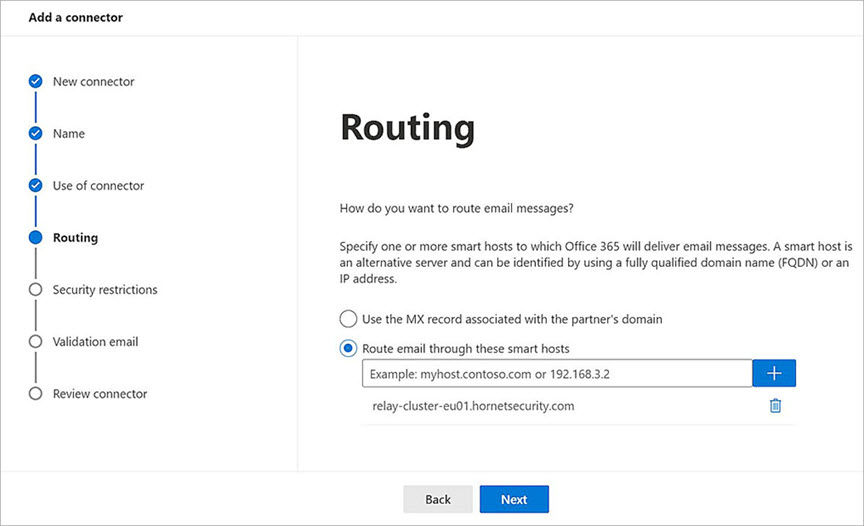
The Routing wizard opens. - Select Route Email Through these Smart Hosts.
- In the text box, type the smart host relay-cluster-eu01.hornetsecurity.com. Click +.
We recommend the hostname cluster relay-cluster-eu01.hornetsecurity.com. However, customers with a customized Control Panel can instead use the hostname cluster <domain.tld>.relay.cloud-security.net where <domain.tld> is the company primary domain.
- For customers in the USA, the hostname cluster relay-cluster-usa01.hornetsecurity.com applies.
- For customers in Canada, the hostname cluster relay-cluster-ca01.hornetsecurity.com applies.
- Click Next.
The Security Restrictions wizard opens.
- In the Security Restrictions page, keep the default settings.
- Click Next.
The Validation Email wizard opens.
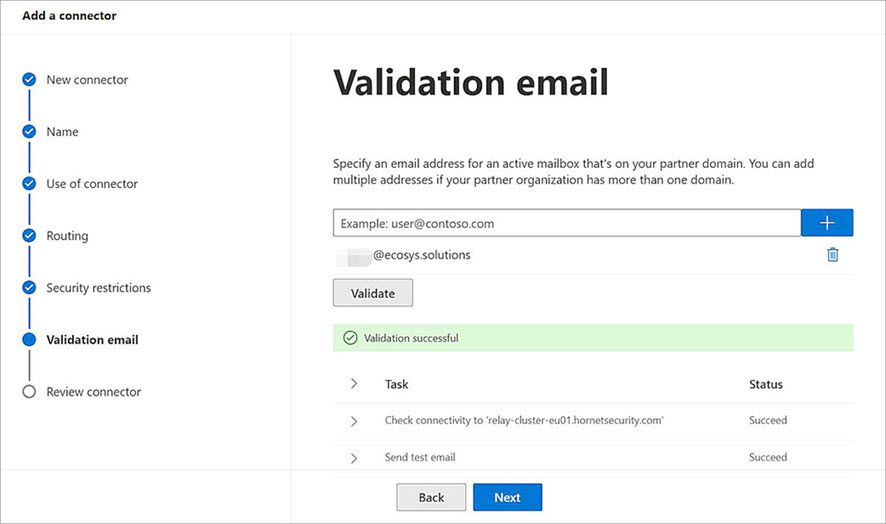
- In the text box, type the validation email. Click +.
- Click Validate.
- If the validation is successful, click Next.
The Review Connector wizard opens.
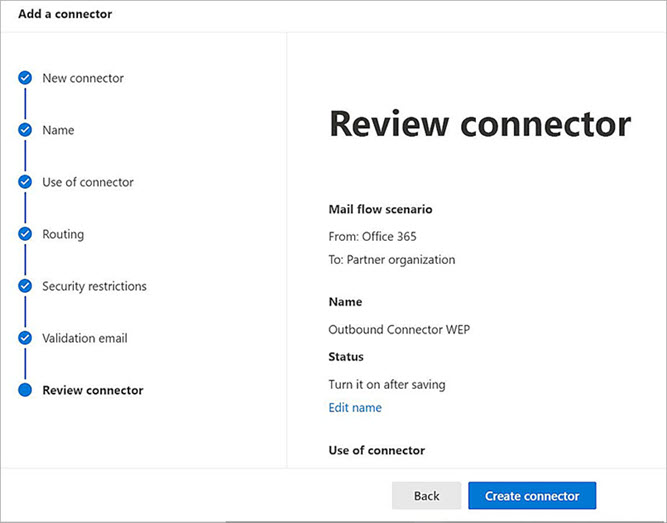
- Click Create Connector.
- Click Done.
Manually Set Up a New Transport Rule
Create a rule to forward outgoing email messages to recipients outside of your organization. The outbound email traffic connector is applied to outgoing email messages to recipients outside of the organization.
To set up a new transport rule:
- Log in to the Microsoft 365 admin center.
- From the navigation menu, select Admin Centers > Exchange > Mail Flow > Rules.
The Rules page opens.
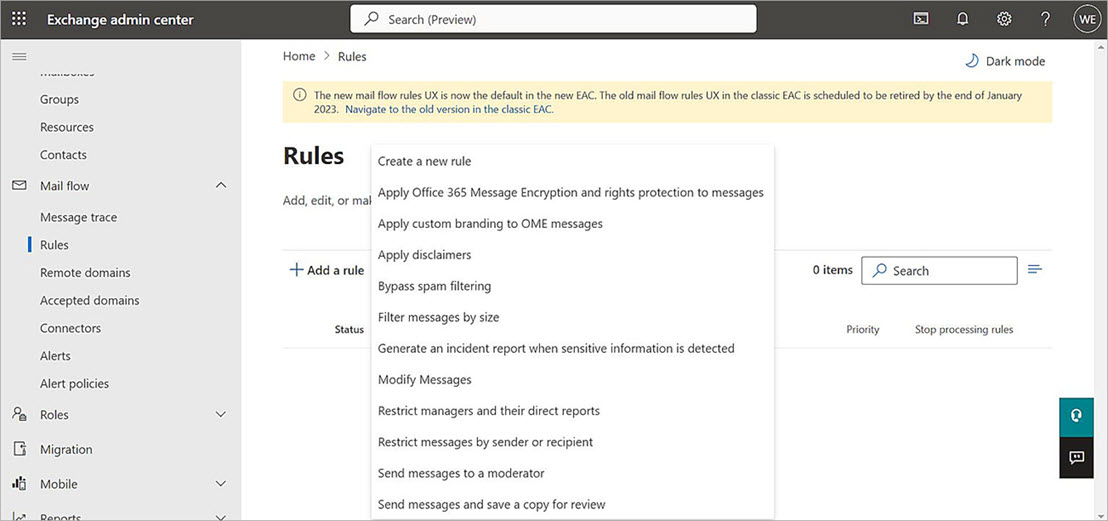
- Click Add a Rule > Create a New Rule.
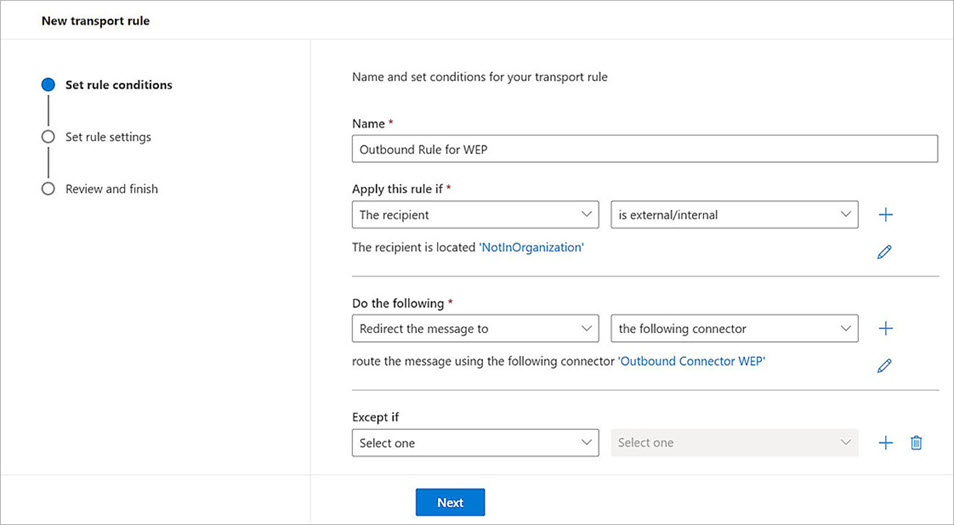
The Set Rule Conditions page opens.
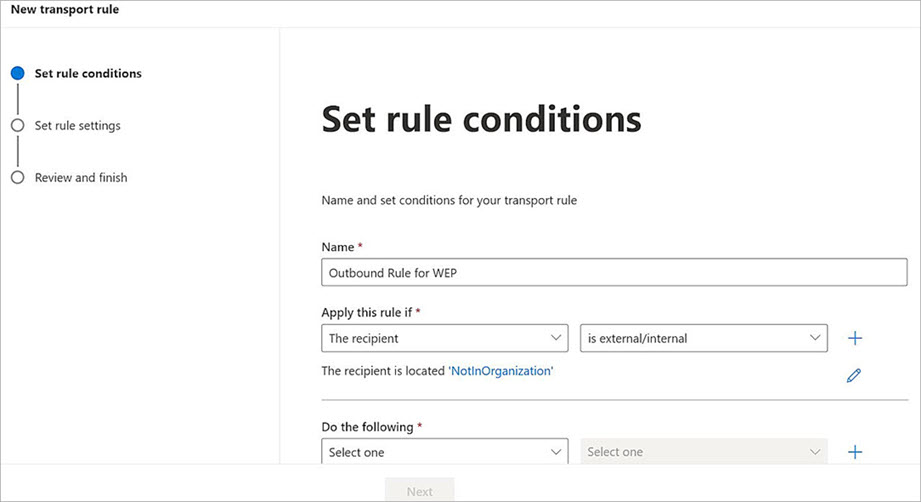
- In Name text box, type the rule name.
- From the Apply this Rule If drop-down list, select The Recipient > Is External/Internal > Outside the Organization.
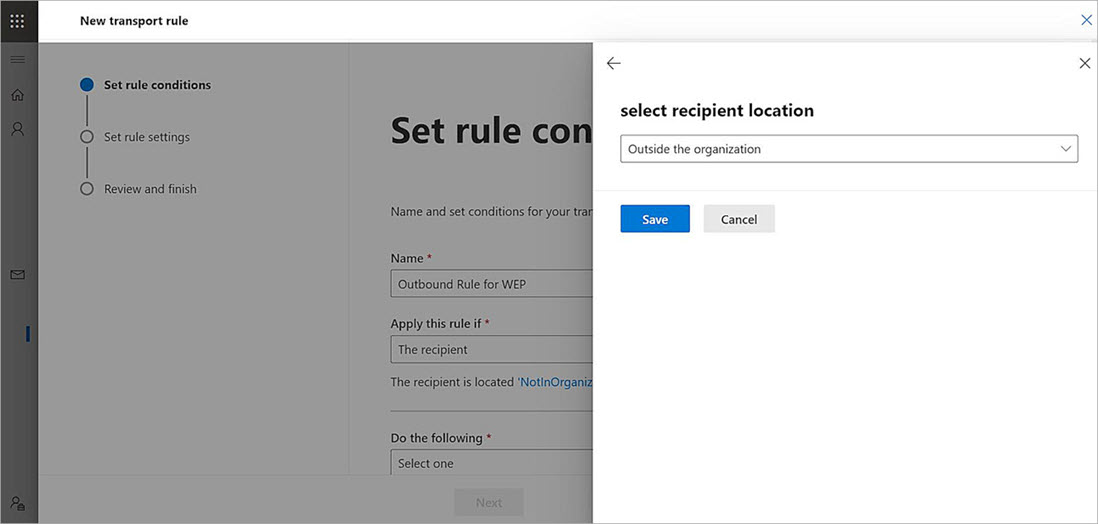
- Click Save.

- From the Do the Following drop-down list, select Redirect the Message to > The Following Connector > Your Outbound Connector .
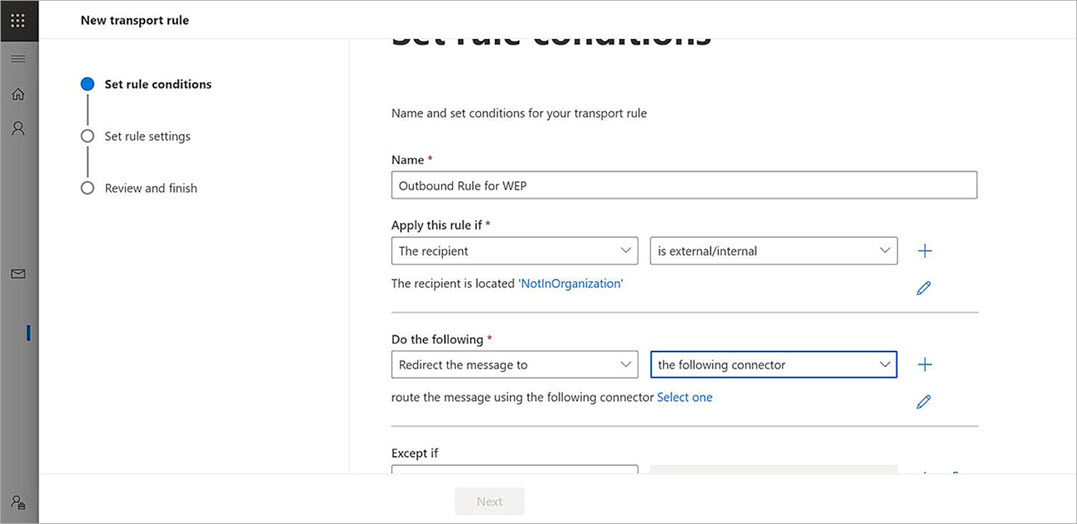
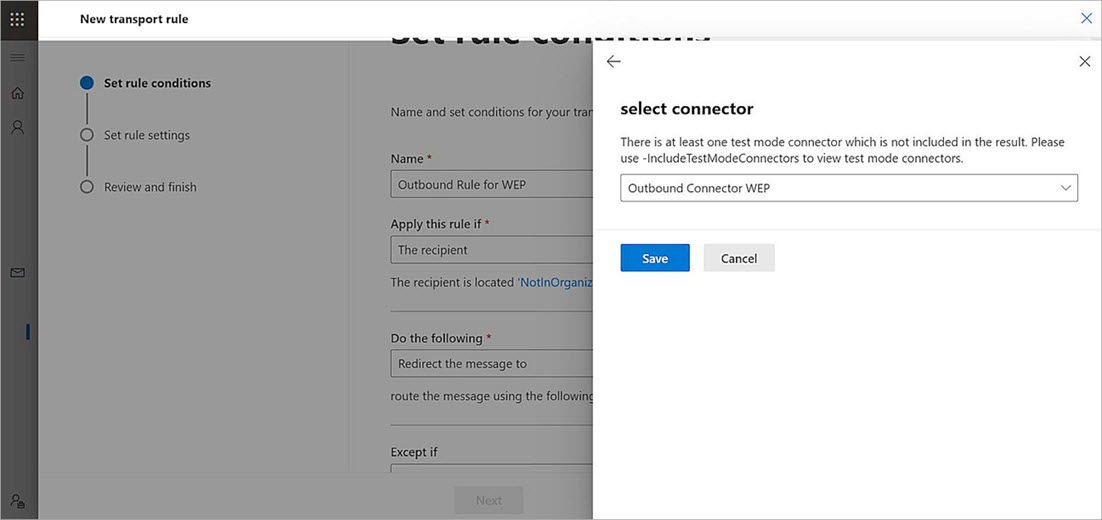
- Click Save.
- Click Next.
The Set Rule Settings page opens.
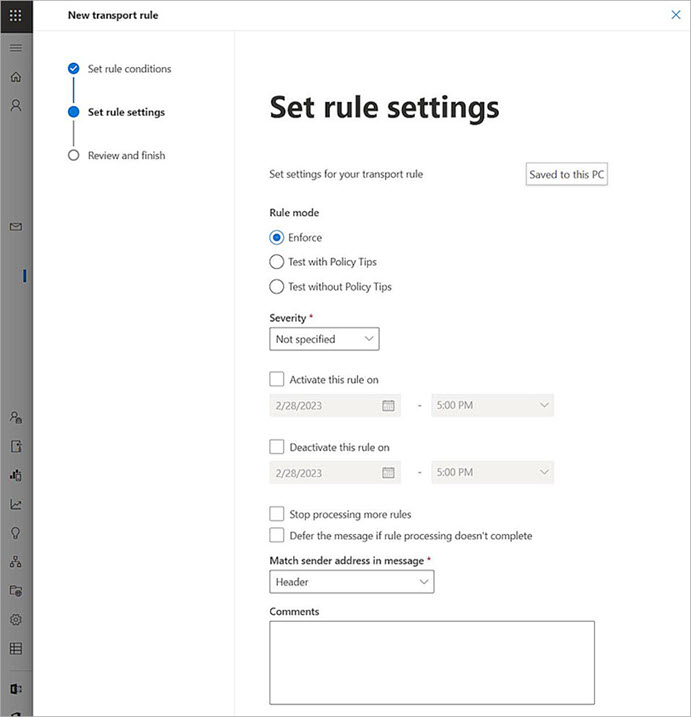
- In the Set Rule Settings page, keep the default settings.
- Click Next.
- Click Finish.
- Click Done.
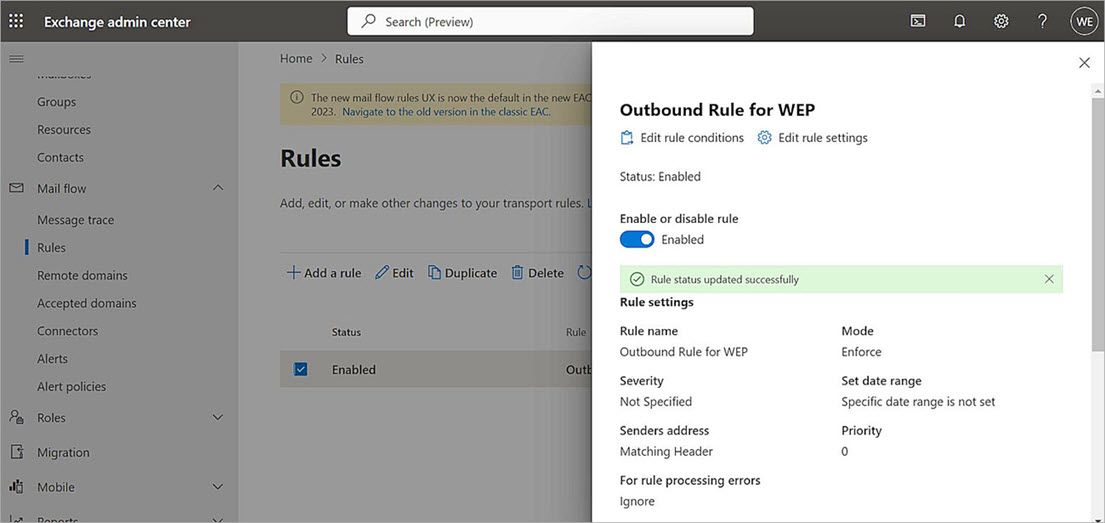
The rule is created with a Disabled status. - From the Rules page, select the new rule you just created.
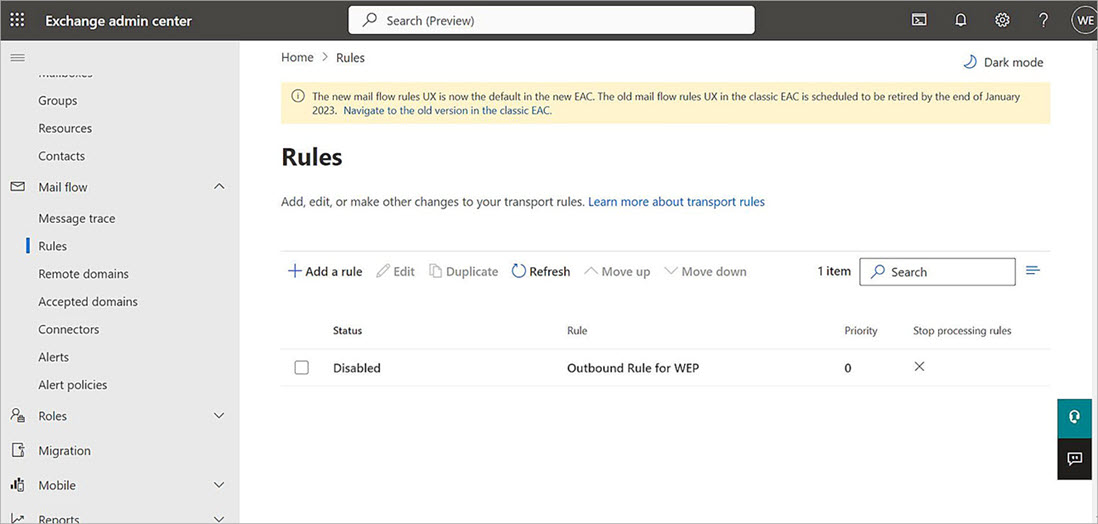

- Enable the new rule.
Test the Integration
To test the integration:
- Send an email message from outside to the WatchGuard Email Protection protected mail server. (Inbound)
- Send an email message from the WatchGuard Email Protection protected mail server to outside. (Outbound)
- Verify that inbound and outbound mail sends and receives successfully.
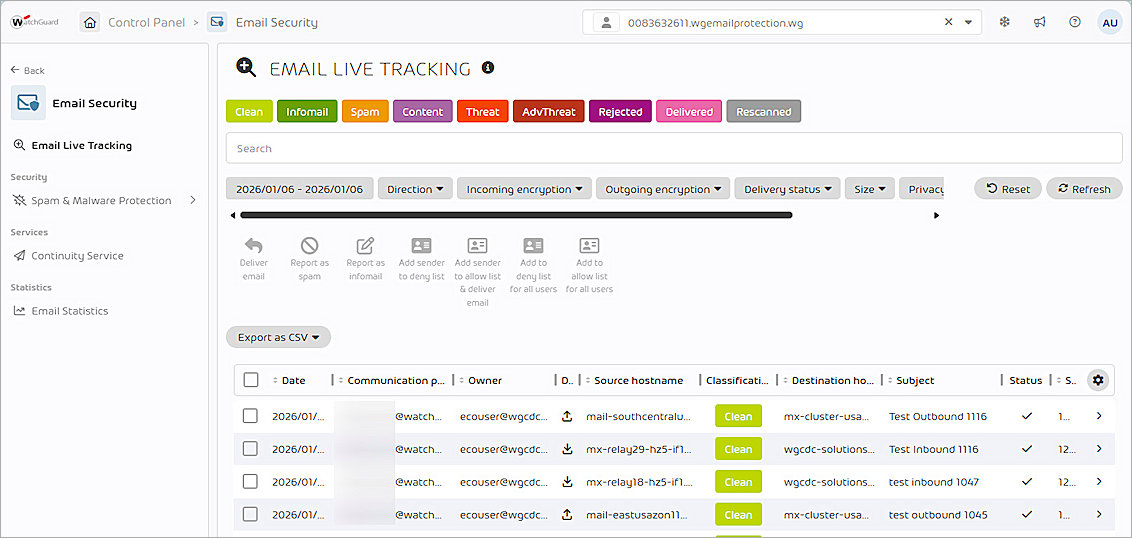
- Verify that email messages appear in the Email Live Tracking page in WatchGuard Email Protection.
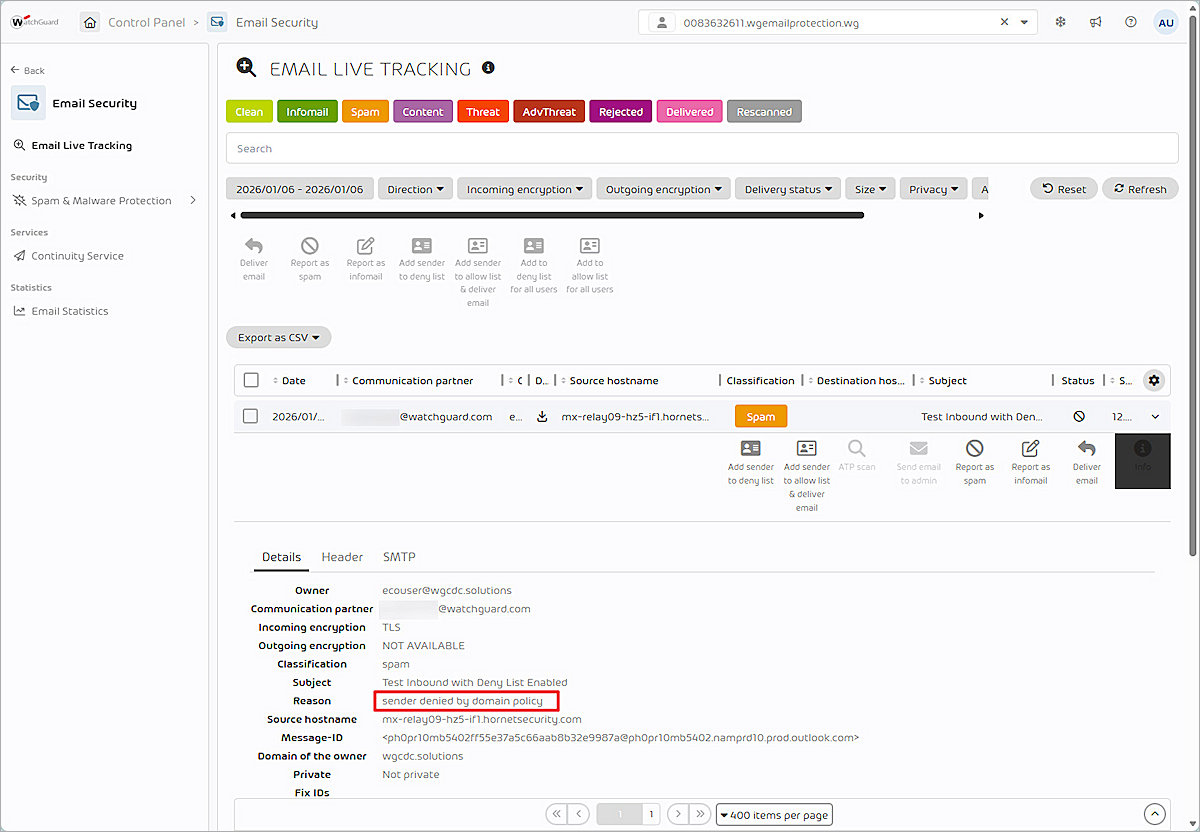
- Add a policy in WatchGuard Email Protection. For example, we added a deny list entry to deny email messages from the watchguard.com domain.
For more information about deny and allow lists, go to Deny & Allow Lists in Email Protection Help. - Verify that inbound mail is blocked by WatchGuard Email Protection according to the policy you create.
- Verify that outbound mail sends and receives successfully.
- Verify that the expected information appears in the Email Live Tracking in WatchGuard Email Protection.
It might take some time for the deny list to filter the incoming email message.
Advanced Operations
Get the Microsoft 365 MX and TXT Values
To get the Microsoft 365 MX and TXT values:
- Log in to Microsoft 365 admin center.
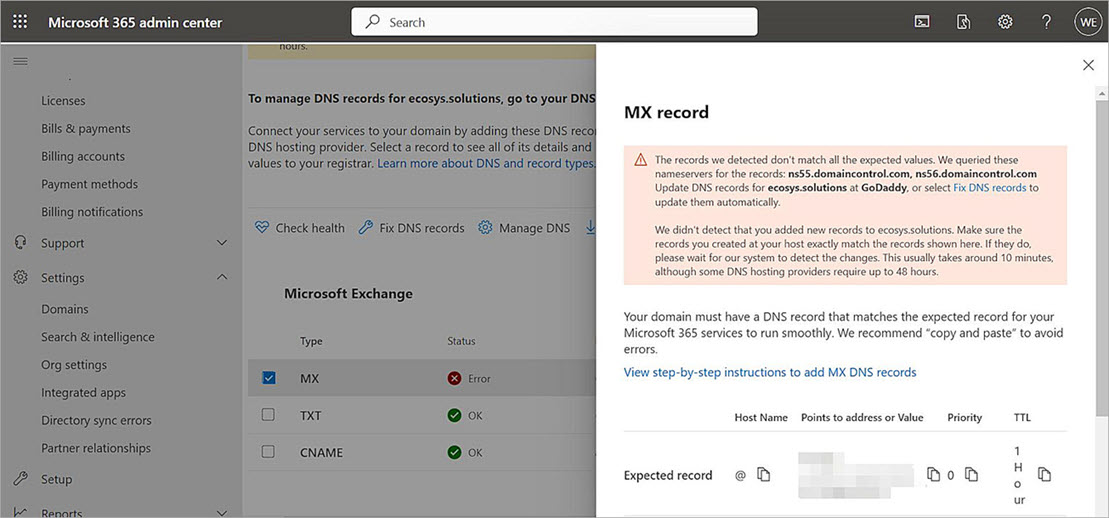
- Select Settings > Domains > Your Domain Name > DNS records.
- Double-click MX.
- From the Points to Address or Value section, copy the MX record.
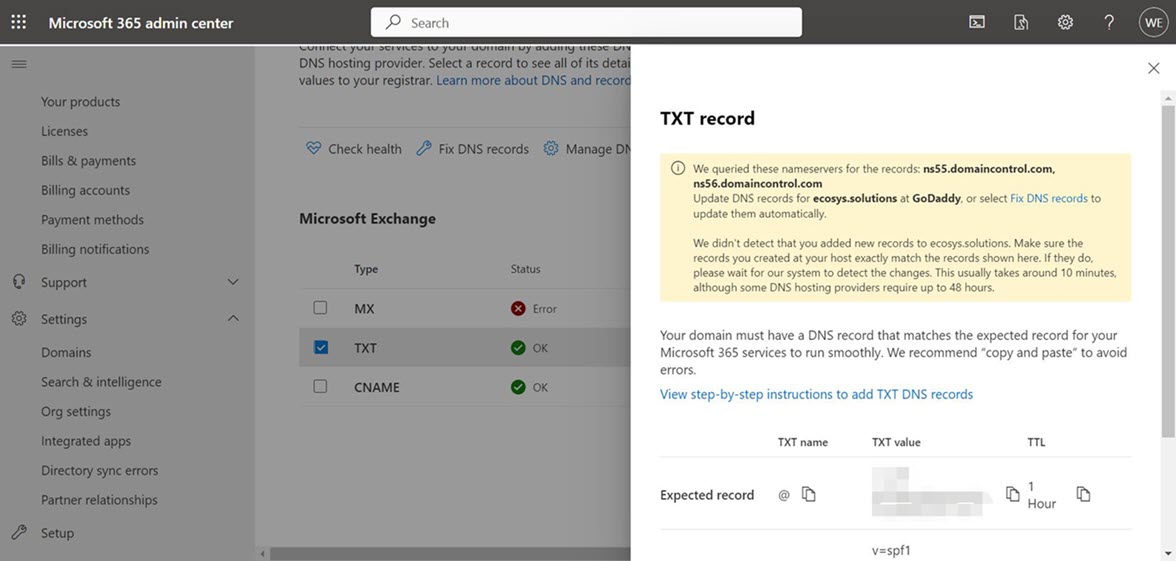
- Select Settings > Domains > Your Domain Name > DNS Records.
- Double-click TXT. The Microsoft 365 TXT record displays. The Email Protection SPF record is appended after the Microsoft 365 TXT record in the GoDaddy configuration.
WatchGuard Email Protection Server MX Records
Europe
The MX records for customers in Europe are:
| Domain | Class | Type | Priority | Email server |
|---|---|---|---|---|
| <domain.tld> | IN | MX | 10 | mx01.hornetsecurity.com |
| <domain.tld> | IN | MX | 20 | mx02.hornetsecurity.com |
| <domain.tld> | IN | MX | 30 | mx03.hornetsecurity.com |
| <domain.tld> | IN | MX | 40 | mx04.hornetsecurity.com |
For customers of the DNS provider 1&1, these MX records apply instead:
| Domain | Class | Type | Priority | Email server |
|---|---|---|---|---|
| <domain.tld> | IN | MX | 10 | mx23a.antispameurope.com |
| <domain.tld> | IN | MX | 20 | mx23b.antispameurope.com |
| <domain.tld> | IN | MX | 30 | mx23c.antispameurope.com |
| <domain.tld> | IN | MX | 40 | mx23d.antispameurope.com |
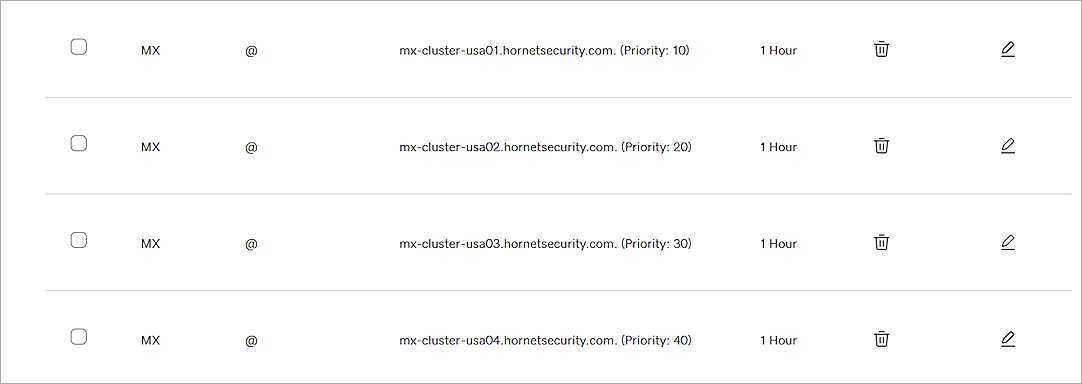
United States
The MX records for customers in the US are:
| Domain | Class | Type | Priority | Email server |
|---|---|---|---|---|
| <domain.tld> | IN | MX | 10 | mx-cluster-usa01.hornetsecurity.com |
| <domain.tld> | IN | MX | 20 | mx-cluster-usa02.hornetsecurity.com |
| <domain.tld> | IN | MX | 30 | mx-cluster-usa03.hornetsecurity.com |
| <domain.tld> | IN | MX | 40 | mx-cluster-usa04.hornetsecurity.com |
Canada
The MX records for customers in Canada are:
| Domain | Class | Type | Priority | Email server |
|---|---|---|---|---|
| <domain.tld> | IN | MX | 10 | mx-cluster-ca01.hornetsecurity.com |
| <domain.tld> | IN | MX | 20 | mx-cluster-ca02.hornetsecurity.com |
| <domain.tld> | IN | MX | 30 | mx-cluster-ca03.hornetsecurity.com |
| <domain.tld> | IN | MX | 40 | mx-cluster-ca04.hornetsecurity.com |
IP Addresses of WatchGuard Email Protection Servers
WatchGuard Email Protection Servers IP Address Range
| 83.246.65.0/24 | 94.100.128.0/24 | 94.100.129.0/24 | 94.100.130.0/24 | 94.100.131.0/24 |
| 94.100.132.0/24 | 94.100.133.0/24 | 94.100.134.0/24 | 94.100.135.0/24 | 94.100.136.0/24 |
| 94.100.137.0/24 | 94.100.138.0/24 | 94.100.139.0/24 | 94.100.140.0/24 | 94.100.141.0/24 |
| 94.100.142.0/24 | 94.100.143.0/24 | 173.45.18.0/24 | 185.140.204.0/24 | 185.140.205.0/24 |
| 185.140.206.0/24 | 185.140.207.0/24 |
WatchGuard Email Protection Servers IP Address Range in Canada
| 108.163.133.224/27 | 199.27.221.64/27 | 209.172.38.64/27 | 216.46.2.48/29 | 216.46.11.224/27 |